Showing posts with label meal ideas. Show all posts

Friday, February 19, 2016

Menu for Our Last 9 Days


Sorry it's taken so long to write this final post about our diet experience. It's been a very busy month! Well this diet certainly was not easy. It took a lot of planning and even then we had a lot of curve balls thrown our way with illness, failed recipes, and a lot of time spent making more than normal from scratch. I ended up completing 24 full days and then remained on the diet about 80% of the time for Lola's last 6 days. Lola did the full 30 days but on day 28 her oh so generous brother was feeding her unapproved granola bars for breakfast while I was in the shower. Overall, we learned a lot from this diet and will continue to use some components of it in the future. Since quitting the diet we have gone back to our grains but have cut back quite a bit and no longer feel like there MUST be a grain at every meal. While I haven't had any stomach aches or reactions since going back to eating our normal food, I have felt the carbohydrate overload and we haven't even gone back to the full swing of carbs that we used to! My 4 am "I'm starving" pregnancy wake up calls have also returned. I'm realizing that carbs aren't really helping me stay full and I'm not liking this carbohydrate overload feeling. We will continue to try to reduce carbs but have a lot of carbs in our pantry that need to be eaten first. Since going back on the diet, I've significantly reduced how many junk and full of carbohydrate products that we purchase, although the guys in my life still "need" me to purchase their loaf of bread each week! If you are considering this diet, I recommend you try it but be very organized about it because it can be difficult and emotional. Good luck!

Day 22 - Thursday:
  • Breakfast: Banana Blueberry Muffins and Clementines
  • AM Snack: Apples and Strawberries
  • Lunch: Leftover Chicken Tacos, Guacamole, Pico de Gallo, and Mixed Berries
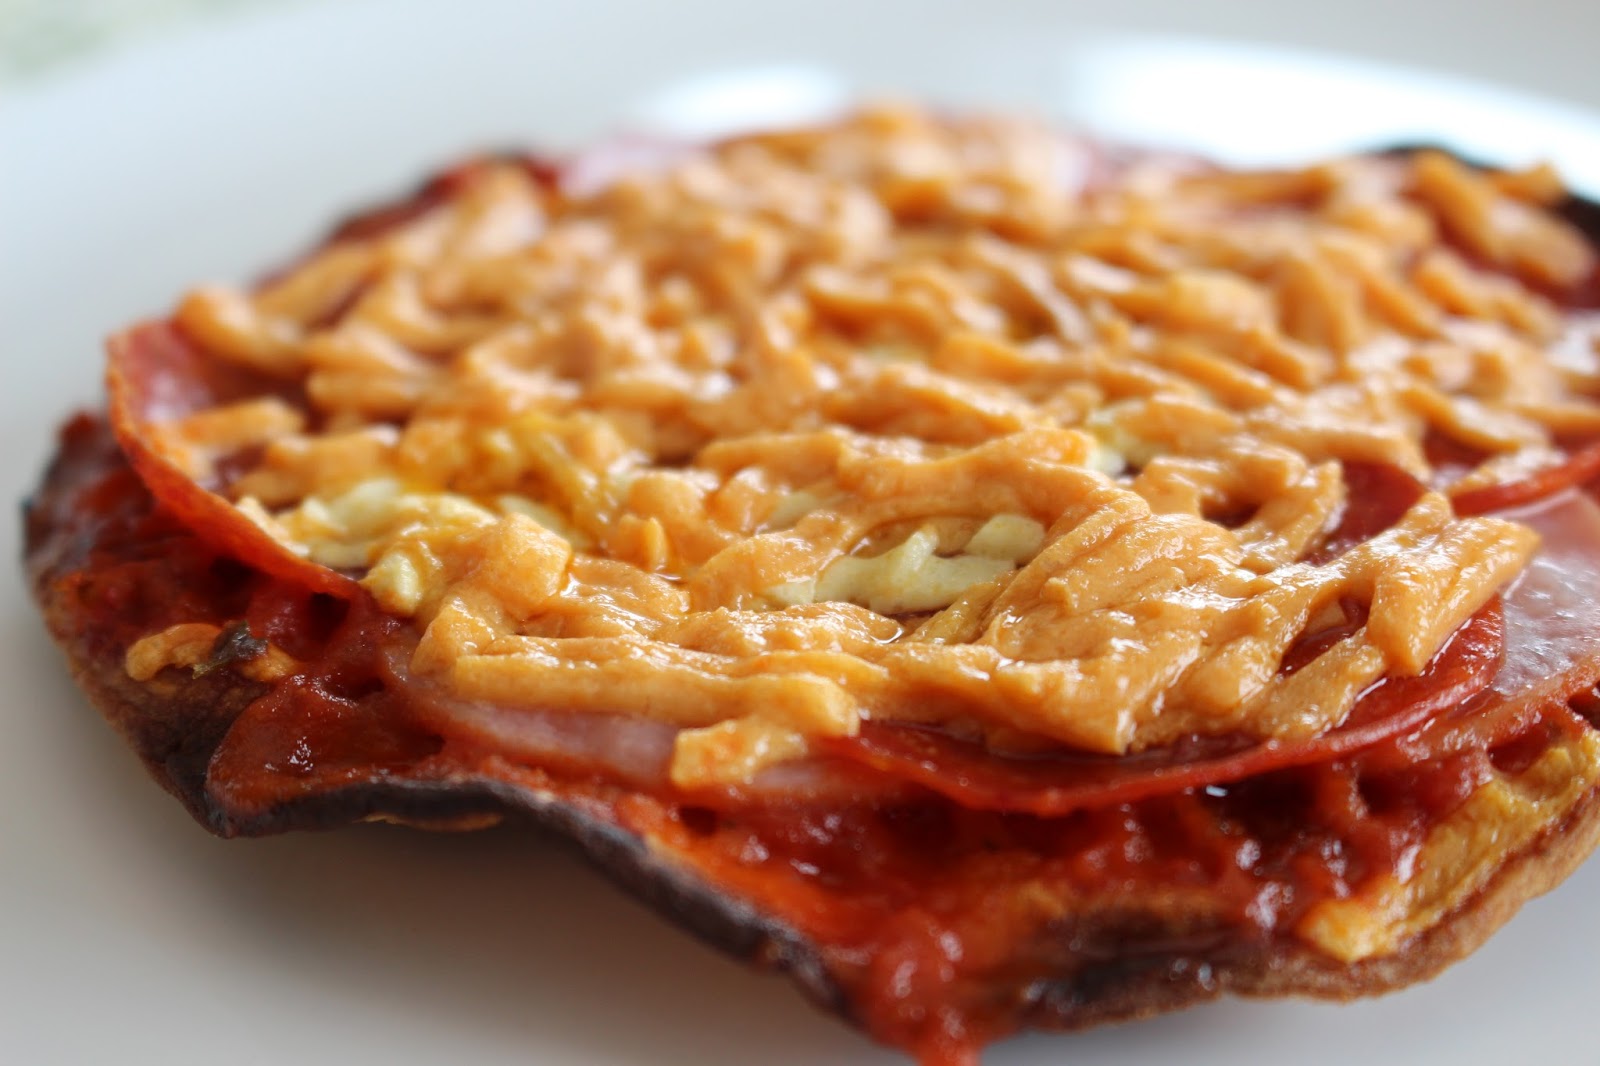
  • PM Snack: Mini Sausage Pizzas on Flat bread, Apples with Raisins and Almond Butter
  • Dinner: Beef Roast, Salad and Mixed Berries
Day 23 - Friday:
  • Breakfast: Scrambled Eggs, Almond Butter and Banana
  • AM Snack: Unsweetened Applesauce
  • Lunch: Leftover Beef Roast, Baked Potato, and Mixed Berries
  • PM Snack: Apple Slices, Macadamia Nuts, Dried Cherries and Dried Blueberries
  • Dinner: Smoky Lime Chicken, Green Beans, and Cantaloupe 
Day 24 - Saturday:
Day 25 - Sunday:
  • Breakfast: Almond Butter with Banana and Applesauce
  • AM Snack: Fruit Leather and Applesauce
  • Lunch: Leftover Meatballs in Marinara in a Tortilla
  • PM Snack: Apples, Raisins, and Almond Butter
  • Dinner: Buffalo Bites Popcorn Chicken, Frozen Pizza (guys only), Chips and Blueberries
Day 26 - Monday:
  • Breakfast: Scrambled Eggs and Blueberries
  • AM Snack: Chips and Raisins
  • Lunch: Popcorn Chicken, Green Beans, Oranges and Blueberries
  • PM Snack: Applesauce
  • Dinner: Butter Garlic Shrimp over Spaghetti Squash, Green Beans, and Blackberries
Day 27 - Tuesday:
  • Breakfast: Chick-Fil-A Hashbrowns, Almond Butter and Banana
  • AM Snack: Banana
  • Lunch: Applegate Uncured Beef Hot Dogs, Spaghetti Squash, Orange, and Green Beans
  • PM Snack: Fruit Leather, Raw Cashews, Chips and Dried Cherries
  • Dinner: Pulled Pork Nachos and Oranges
Day 28 - Wednesday:
  • Breakfast: Almond Butter Plantain Pancakes and Oranges
  • AM Snack: Raisins and Fruit Leather
  • Lunch: Popcorn Chicken, Green Beans and Grapes
  • PM Snack: Leftover Lunch (Kids didn't eat their lunches.)
  • Dinner: Leftover Pulled Pork Nachos, Grapes, and Clementines
Day 29 - Thursday:
Day 30 - Friday:
  • Breakfast: Hash browns and Sausage Patties
  • AM Snack: Grapes
  • Lunch: Leftover Tacos, Broccoli, and Clementines
  • PM Snack: Chips and Raisins
  • Dinner: Officially done with the diet - Chick-Fil-A grilled nuggets, fresh mixed fruit, and waffle fries.
Recipes to Save and Use Again:
Things This Diet Will Change for Us:
  • Read labels for unnecessary ingredients.
  • Be more aware of obvious and hidden sugars and reduce them when possible.
  • Limit or eliminate food dyes as much as possible.
  • We don't need a grain at every meal.
  • Overall, eat less grains but not completely eliminate them.
  • Implement some of the recipes we've discovered into our weekly menus and continue to try new Paleo recipes.
  • Make sausage from ground pork (that we now only purchase from the meat locker) and season ourselves. 

Wednesday, February 3, 2016

Week Three Menu - A Mix of Paleo and Whole30 Eating


Phew! Week 3 of this diet is in the books! I'm not going to sugar coat it, this diet isn't easy and I can't tell you how many times this week I seriously contemplated quitting the diet. It would be easier if I was single but with a husband who loves his gluten and two kids, one who is already a picky eater, this has been pretty stressful on our family. The most stressful part has been failing on recipes, both it just not working out and my family hating the taste and then not knowing what to feed them! Given the stress this next week, we will most likely be repeating meals or going with meal options that I know contain ingredients my family likes versus a bunch of vegetables they've never tried and risk them hating the entire meal. My two year old currently gets up somewhere between 5am-6am to raid the pantry and binge on his favorites like crackers, chips, chocolate covered raisins, granola bars, etc! This diet is certainly taking a toll on him to say the least. He is officially off diet now for the most part except for snacks so there isn't any jealousy. Luckily at meal time she sits far enough away from him to see what he's really having. We are taking away some great recipes that we will use in the future but overall this family is very excited that there are only 9 days left!

Day 15 - Thursday:
  • Breakfast: Scrambled Eggs and Mixed Berries
  • AM Snack: Clementines
  • Lunch: Tuna Flat Bread and Clementines
  • PM Snack: Apples with Cashew Butter and Raisins on Top
  • Dinner: Paleo Fish Sticks (We weren't impressed and the house still stinks!), Green Beans, and Mixed Berries
Day 16 - Friday:
  • Breakfast: Apple Cinnamon Roll Porridge (This was awful.), Sausage and Mushroom Wrap, and Leftover Pizza
  • AM Snack: Chick-Fil-A Hash browns (contain a small amount of dextrose), Unsweetened Applesauce, and Clementines
  • Lunch: Leftover Paleo Fish Sticks, Fries, and Mixed Berries
  • PM Snack: Apple Slices, Raisins, and Macadamia Nuts
  • Dinner: Smoky Lime Marinated Chicken (We LOVED! Even the kids!), Butternut Squash, Clementines, and Apples
Day 17 - Saturday:
  • Breakfast: Plantain Pancakes with Cashew Butter
  • AM Snack: Chips and Dried Cherries
  • Lunch: Homemade Shrimp Poppers (Not impressed.), Green Beans, and Apple Slices
  • PM Snack: Root Chips and Clementines
  • Dinner: Zucchini Lasagna with Almond Ricotta (Not linked to exact recipe we used but the recipe I used for inspiration.), Leftover Green Beans, and Kiwi
Day 18 - Sunday:
  • Breakfast: Larabar, Scrambled Eggs, Clementines and Leftover Tacos
  • AM Snack: Raisins and Unsweetened Applesauce
  • Lunch: Leftover Lasagna, Green Beans, and Kiwi
  • PM Snack: Root Chips with Homemade Smoky Chia Cheeze (Recipe isn't perfect enough for sharing yet!), and Unsweetened Applesauce
  • Dinner: Beef Rib Roast, Leftover Butternut Squash, and Apple Slices
Day 19 - Monday:
  • Breakfast: Almond Butter Wraps and Seasoned Hash browns
  • AM Snack: Raisins
  • Lunch: Leftover Rib Roast, Baked Potato, and Apple Slices
  • PM Snack: Sweet Potato Chips, Unsweetened Applesauce, Larabar, and Fruit Leather
  • Dinner: Stew Meat with Mushrooms and Onions, Salad and Pears
Day 20 - Tuesday:
Day 21 - Wednesday:
  • Breakfast: Scrambled Eggs, Mixed Fruit, Homemade Tater Tots
  • AM Snack: Raisins
  • Lunch: Leftover Beef and Cabbage Stir Fry, Applegate Beef Hot Dogs, and Banana
  • PM Snack: Macadamia Nuts and Raisins
  • Dinner: Salsa Chicken Tacos with Guacamole and Pico de Gallo on Tortillas, and Apple Slices
Recipes to Save and Use Again:

Sunday, June 21, 2015

Dirty Rice


I discovered a recipe for the southern dish dirty rice when I was trying to use our leftovers to make something and clean out the fridge one day. Only problem was that the recipes I was finding called for peppers, which I never have because I hate them. So this is our family's twist on dirty rice, using vegetables that we like and typically have in the fridge. This recipe is designed for the rice cooker though because if you know me, you know the one thing I can't cook is rice!

Dirty Rice
About 6 servings

In the rice cooker:
1 tablespoon canola oil
4 cups dry jasmine rice
About 3 regular cups of gluten free beef broth (Use the rice cooker guide for how much water is needed for 4 cups of dry white rice. My cooker requires 4.5 cups (using the rice cooker's measuring cup) which equated to about 3 regular cups.)
1/16 teaspoon ground black pepper
1/2 teaspoon garlic powder

In a skillet:
1 tablespoon canola oil
16 oz sliced and washed white mushrooms
3 stalks or about 1.5 cups chopped celery
1 medium chopped onion

Also need:
1/2-3/4 lb cooked ground beef

Directions: Place all of the rice cooker ingredients in the rice cooker and start. While the rice is cooking, place skillet ingredients in the skillet and cook over medium to medium high heat. Cook until vegetables are soft. The celery takes the longest to soften so if you don't like crunchy celery like me, make sure you give the celery about a 5 minute head start on cooking. In a skillet, cook the ground beef over medium heat until well done and juices run clear. Once the rice is done place it in a large bowl and add the cooked ground beef and skillet vegetable mix. Mix together until vegetables and ground beef are well distributed throughout the rice. Serve immediately and season with salt, pepper, and/or garlic salt to your liking at the table.

Disclaimer: It is always important to read labels because brands frequently change their ingredients. These ingredients and brands work for my family but some may be processed in the same facility as wheat, soy, dairy and/or eggs and therefore depending on your severity may or may not work for your family.

Mini Tortilla Pizzas


I've always been a huge pizza lover. The only problem is that it takes a long time to make it, especially when I make dough from scratch. My other issue is that the crust isn't exactly cheap even if I make it from scratch and especially not if I use a mix. I thought back to my college days when I was too lazy to make food and would throw a sandwich wrap from the deli section on a cookie sheet and use it as a pizza crust. Why couldn't I do something similar with corn tortillas? (Which by the way are SUPER cheap!) So I went to work and have made these lots of times since. Oliver likes them too because they are nice and small. They are easy to have the kids make their own too.

Step 1: Make your crusts. I've done these a couple ways so it depends on your preference. Whatever you do though, don't cook these in the microwave unless you want a pile of mush! Lightly butter (using Soy Free Earth Balance of course) a corn tortilla on both sides. Using either a non stick skillet or griddle fry the tortilla on both sides or until crisp. I've also lightly buttered tortillas and then made them crisp by placing them under a high broiler. This goes fast though and I have burned them a few times so you really have to watch them and turn them every minute or two. Personally I prefer the griddle because I can cook so many at a time. More often than not though I'm too lazy to pull that thing out and clean it so I do the frying pan instead.

Step 2: Place your crusts on a cookie sheet. Top with pizza sauce, toppings of your choice and Daiya cheese. Place the cookie sheet in the oven on a high broiler, watching carefully. Move the sheet around as needed to get pizzas evenly browned.

Step 3: Remove from the broiler and cut into fourths. Crust will likely be somewhat soft in the middle but for the most part I am able to pick up these little triangles and eat them as finger food.

Step 4: Enjoy! Just make sure you make enough. Tortilla shells are low calorie so these aren't super filling. Plus if you have a little one in the house like I do, you end up having to share half your pizza!

Disclaimer: It is always important to read labels because brands frequently change their ingredients. These ingredients and brands work for my family but some may be processed in the same facility as wheat, soy, dairy and/or eggs and therefore depending on your severity may or may not work for your family.

Friday, May 1, 2015

Mongolian Beef


I love the Panda Express version of Mongolian Beef. I haven't been able to have it since going gluten free so I've done my best to make it at home. Now with Lola's soy allergy it's become even more difficult but this recipe did a pretty good job. I didn't have any green onions so I threw in some white ones and some broccoli in instead. It's the sauce that really matters. You do what you want with the vegetables. This dish was fantastic as is though!

Mongolian Beef
Yield 6 servings

1 pound beef stew meat
1 tablespoon brown rice flour
1/2 teaspoon salt
8 oz baby bella mushrooms, sliced
1 medium onion, sliced
6 oz frozen broccoli
4 teaspoons canola oil + 1 tablespoon for frying
4 teaspoons minced fresh garlic
3/4 cup brown sugar
1/4  cup + 1 tablespoon coconut aminos
3/4 cup gluten free beef broth
1/2 teaspoon Orrington Farms Low Sodium Broth Base and Seasoning (must be low sodium version)
2 teaspoons Lea and Perrins worcestershire sauce (Previously contained soy so check your label!)
3/4 teaspoon ginger
1/2 teaspoon fish sauce
1 tablespoon corn starch
1 tablespoon water

Directions: Place stew meat in a bag along with the brown rice flour and salt. Seal the bag and shake until evenly coated. Place 1 tablespoon of canola oil in the frying pan over medium heat and cook meat until no longer pink. Remove meat from the pan and set aside. Place sliced and washed mushrooms, sliced onions, minced garlic and broccoli in the pan along with the remaining oil and cook until vegetables are completely cooked and soft. Remove vegetables from the pan and place in the bowl with the meat. Place the beef broth, brown sugar, coconut aminos, beef seasoning, worcestershire sauce, ginger, and fish sauce in the pan. Mix well and cook for 2 minutes over medium heat. Return the cooked meat and vegetables to the skillet and cook for another 2 minutes. In a small bowl, mix the corn starch and water. Pour the corn starch mixture into the skillet and mix well. Sauce will thicken quickly. Continue to cook until mixture reaches the desired thickness. Serve over rice.

Disclaimer: It is always important to read labels because brands frequently change their ingredients. These ingredients and brands work for my family but some may be processed in the same facility as wheat, soy, dairy and/or eggs and therefore depending on your severity may or may not work for your family.

Monday, April 13, 2015

Broccoli Scalloped Potatoes and Ham

Growing up I was not a huge fan of scalloped potatoes and ham. It was a dish my mom made often enough for me to remember though. Since then I have grown to like it but have put my own twist on the dish plus have had to make a few substitutes! It's a nice and cheap meal with the bulk of it being potatoes and I love using red potatoes because it's easy to leave the skin on and not mess with all the peeling!


1 medium onion
1/2 package (6 oz) steamer broccoli florets
1/2 lb. deli ham (Land O Frost black forest ham)
2 cups rice milk
1/4 cup Soy Free Earth Balance Butter Spread
1/4 cup brown rice flour
6 small red potatoes or about 3 medium to large potatoes
1/8 teaspoon ground black pepper
1 teaspoon garlic salt
1/2 cup Daiya cheddar cheese style shreds

Directions: Preheat the oven to 350 degrees. Lightly grease a 9 x 13 pan. Chop onion, thawed broccoli, and ham, setting each ingredient aside in a separate bowl. Slice red potatoes leaving the skins on. Melt butter and place melted butter, brown rice flour, garlic salt, pepper and milk in a separate bowl. Whisk with a fork until the flour is well blended. Place a single layer of potato slices in the pan followed by half of the broccoli, half of the onion, half of the ham and half of the cheese. Gently pour half of the milk mixture over top. Then layer the remaining potatoes, broccoli, onion, ham and cheese. Pour the remaining milk mixture over top. Bake at 350 degrees for 50 minutes or until a fork can easily pass through the potatoes.

Disclaimer: It is always important to read labels because brands frequently change their ingredients. These ingredients and brands work for my family but some may be processed in the same facility as wheat, soy, dairy and/or eggs and therefore depending on your severity may or may not work for your family.

Friday, March 27, 2015

Sloppy Joes


This recipe is my mom's. When we were kids she would make barbecue shape-ups (sloppy Joe meat and cheese on top of rolled out crescent roll with another crescent roll on top.) This meal was a favorite for some in our family and I frequently remember my sister requesting this meal for her birthday. The recipe below is just for the meat portion. Tonight I served David and Oliver these as barbecue shape-ups while I had mine on this white bread loaf I made.

Sloppy Joe Meat
Yield 6 servings

1.5 ground beef, turkey or pork
3/4 cup ketchup
1/4 cup plus 1/8 cup barbecue sauce (I use Jack Daniels)
1 tablespoon Dijon mustard
1 tablespoon brown sugar
1 teaspoon lemon juice

Directions: Heat ground meat over medium heat until brown and juices run clear. Reduce heat to low. Add ketchup, barbecue sauce, mustard, brown sugar and lemon juice, mix well. Serve immediately on top of bread with cheese.

Disclaimer: It is always important to read labels because brands frequently change their ingredients. These ingredients and brands work for my family but some may be processed in the same facility as wheat, soy, dairy and/or eggs and therefore depending on your severity may or may not work for your family.

Monday, March 23, 2015

Chicken Twisters Like KFC


About a year before my allergies were diagnosed, I fell in love with the KFC chicken twister. It's a wrap with crispy chicken tenders, a peppered mayo, tomatoes and lettuce. Soooo good! Mc Donald's makes a similar item but it's advertised as a snack. These have the ingredients of the twister but the size of the Mc Donald's snacker given the size of the tortilla. Regardless, they are a favorite of mine. With Lola's soy allergy, I was worried I would have to give them up. I usually buy Perdue's gluten free chicken breast tenders and thankfully these still work. I must emphasize the tenders part though. I found some chicken nuggets in the Perdue brand that had soy oil. Also Tyson's gluten free chicken strips contain soy. Luckily Perdue's chicken breast tenders can easily be found at Target or Walmart and they frequently have coupons online for you to print. The regular price is pretty similar to wheat chicken tenders but when you can find a coupon on them, they are quite a bit cheaper than some brands. I use corn tortillas in the recipe because they are cheap and easy to find at a regular grocery store. Most people don't like corn tortillas and trust me, I'm not a huge fan either. I don't use them for my tacos because I don't really like them. However, they taste great in this meal!

Chicken Twisters
Yield 4 servings

8 corn tortillas (ensure gluten free)
8 Perdue gluten free chicken breast tenders
2 tomatoes
1 bag of shredded lettuce
Earth Balance Mindful Mayo (vegan)
Pepper

Directions: Cook chicken tenders in the oven per package directions. Get a paper towel wet and wring out. Open up the wet paper towel onto a plate. Place one corn tortilla on the paper towel and fold edges over top of the tortilla. Place in the microwave and cook for 20-25 seconds. Unwrap tortilla. Tortilla should be very soft. If not, heat for another 5-10 seconds. Spread mayo over the tortilla. Crack or shake the desired amount of pepper evenly over the tortilla and mayo. Place one chicken strip in the center of the tortilla. Top with slices of tomato and shredded lettuce. Fold over the tortilla and enjoy. Do this for the remaining tortillas and chicken tenders.

Disclaimer: It is always important to read labels because brands frequently change their ingredients. These ingredients and brands work for my family but some may be processed in the same facility as wheat, soy, dairy and/or eggs and therefore depending on your severity may or may not work for your family.

Sunday, March 22, 2015

Creamy Vegetable Beef and Bacon Stew


I am not a huge fan of soup. I'm also not a fan of vegetables so it's surprising that I would even make this dish but I actually really like it. David really likes this dish too and will eat more bowls of it than I can count in one sitting. You'll enjoy this hearty stew!

Creamy Vegetable Beef and Bacon Stew
Yield 6 servings

1 lb. ground beef
1/2 lb. bacon, chopped
1 medium onion
1 cup mixed frozen vegetables (corn, green beans, carrots, and peas)
1 can Bush's mild black chili beans
1 can (14.5 oz) diced tomatoes
3 medium red potatoes, diced and peel left on
1 cup water
3/4 cup Daiya cheddar cheese style shreds
1/2 tablespoon salt
1/2 teaspoon ground black pepper
1/2 teaspoon Italian seasoning
1/4 cup Soy Free Earth Balance Butter Spread
1/4 cup brown rice flour
2 cups almond milk

Directions: Cook ground beef until brown and juices run clear, place in the crock pot. Chop bacon into pieces and cook in a skillet over medium heat until brown and no longer pink. Remove grease and place in the crock pot. Chop onion and place in the crock pot followed by the frozen vegetables, black beans drained, tomatoes drained, diced red potatoes, water, Daiya cheese, salt, pepper and Italian seasoning in the crock pot. In a liquid measuring cup, melt the butter. Then add the flour and almond milk and whisk until well blended. Pour mixture into the crock pot. Cook on low for 8-9 hours or on high for 5-6 hours.

Disclaimer: It is always important to read labels because brands frequently change their ingredients. These ingredients and brands work for my family but some may be processed in the same facility as wheat, soy, dairy and/or eggs and therefore depending on your severity may or may not work for your family.

Monday, March 16, 2015

Teriyaki Chicken Stir Fry


Our family loves to make Chinese food. It has been a challenge though since going soy free. A few weeks ago we made this delicious sesame chicken but I wasn't satisfied with only one kind of allergy friendly Chinese food, so this week I went to work on another. I have found coconut aminos to be a necessary ingredient in making soy free Chinese dishes. It's expensive though so I have been using other ingredients to help stretch the coconut aminos and still have an adequate "soy sauce" like taste to the dish!

Teriyaki Chicken Stir Fry
Yield 4 servings

1 lb. cubed raw chicken
1/3 cup coconut aminos
1/2 teaspoon salt
1/2 cup Dole pineapple orange juice
2 teaspoons sherry cooking wine
2 teaspoons white vinegar
1/4 cup honey
1 teaspoon Orrington Farms Low Sodium Broth Base & Seasoning (must be low sodium version)
1 tablespoon Lea & Perrins worcestershire sauce (Previously contained soy so check your label!)
1/4 teaspoon garlic powder
1 tablespoon sugar
1 tablespoon corn starch
2 tablespoons water
1 bag steamer stir fry vegetables

Directions: Cook cubed chicken until chicken becomes white and juices run clear. While the chicken is cooking, mix coconut aminos, salt, pineapple orange juice, sherry cooking wine, vinegar, honey, beef seasoning, worcestershire sauce, garlic powder and sugar in a medium sized bowl. Once chicken is fully cooked, pour sauce mixture over the chicken and cook over medium heat for 5 minutes. In a small separate bowl, combine corn starch and water and mix well. Pour the corn starch mixture evenly over chicken. Continuously stir the chicken mixture over medium heat as the sauce quickly thickens. Thicken to desired consistency. Serve over rice with stir fry vegetables.

Disclaimer: It is always important to read labels because brands frequently change their ingredients. These ingredients and brands work for my family but some may be processed in the same facility as wheat, soy, dairy and/or eggs and therefore depending on your severity may or may not work for your family.

Tuesday, March 10, 2015

Beef Taco Salad


We love tacos. We love them so much that we eat them at least every other week. They are such an easy meal and with my brother-in-law being a vegetarian, it's actually pretty easy to make this meal work for both him and I by just adding a can on vegetarian refried beans. The trick to this meal is the seasoning. I've made my own taco seasoning a few times but it just isn't as good as store bought in my opinion. Probably because that's what I grew up on. A normal person wouldn't think twice about taco meat containing allergens but fact is...finding taco seasoning that is free of all of my allergens can be hard! Many contain wheat and some contain milk products. While I used to use Old El Paso (they offer coupons frequently), I no longer can use this brand because it contains soy. Now the only seasoning I buy is Ortega and in an effort to reduce our sodium intake, we buy the lower sodium version. Tonight we were busy with friends so I cooked the meat ahead of time and had it warming in the crock pot for when we got home!

Beef Taco Salad
Yields 6 servings

1.5 pounds lean ground beef
1 packet Ortega 40% lower sodium taco seasoning
1 package shredded lettuce or shred your own
1 tomato, diced
1/2 bag Daiya pepper jack style shreds
1 bag Tostitos corn tortilla bite sized rounds (double check other flavors you want to try)
French Dressing

Directions: Place ground beef in a skillet and cook over medium heat until brown and juices run clear. Drain fat and return skillet of beef to medium heat. Add seasoning and water per package directions. Cook until water is completely cooked off. Serve meat along with other toppings. To assemble the salad, crush the desired amount of Tostitos corn tortilla chips and place on a plate. Top with meat, cheese, lettuce and tomatoes. Enjoy!

Disclaimer: It is always important to read labels because brands frequently change their ingredients. These ingredients and brands work for my family but some may be processed in the same facility as wheat, soy, dairy and/or eggs and therefore depending on your severity may or may not work for your family.

Outback's Alice Springs Chicken


Yum! I like Outback for a few reasons but one of the top reasons is that they have a gluten free menu. Right now I am not eating out at all because of Lola's sensitivities so its even more important to me to try to figure out my favorite dishes at home. I almost always order this dish from Outback. Last time I was there they told me it was egg free, however, previously I had been told the honey mustard part was not so make sure you ask questions! Our homemade version was served with rice and green beans.

Alice Springs Chicken
Yield 4 servings

1 lb. chicken breasts
1/3 cup honey
1/3 cup allergy free Dijon mustard
2 teaspoons canola oil
1 package (8 oz) baby Bella mushrooms, washed and sliced
8 strips of gluten and MSG free bacon
1 cup Daiya cheddar cheese
1 tablespoon Soy Free Earth Balance Butter Spread

Directions: The night before serving, mix honey, Dijon mustard and canola oil in a small bowl. Place chicken breasts in a Ziploc bag and pour marinade mixture over. Seal the bag and place on a plate in the fridge overnight. When you are ready to make the chicken, place bacon slices in a skillet over medium heat and cook until fully cooked. Set bacon aside. Place sliced and washed mushrooms and butter in a skillet over medium heat and cook until mushrooms are soft and brown, set aside. Grill chicken breasts until fully cooked and juices run clear. Place each chicken breast on a cookie sheet and top with 1/4 of the mushrooms, 2 slices of bacon, and 1/4 cup of cheese, each. Broil on low until cheese is melted. Serve immediately. If you want some extra sauce for dipping, I recommend you make a second batch of the marinade to place separately in the fridge until you are ready to serve.

Disclaimer: It is always important to read labels because brands frequently change their ingredients. These ingredients and brands work for my family but some may be processed in the same facility as wheat, soy, dairy and/or eggs and therefore depending on your severity may or may not work for your family.

Thursday, March 5, 2015

Baked Potato Soup


This is one of my favorite dishes! You don't need too many ingredients here that you can't buy at Target or Walmart. I am not a big soup fan but I could eat this soup for days and not get sick of it! This soup works well for our family when my brother-in-law visits. My brother-in-law is a vegetarian so we keep the bacon out of the soup and in a separate bowl to use as a garnish at the table, versus in the soup, which makes this an easy meal to fit everyone's dietary needs. On the surface you would think this is a dish I would never be able to have but those are my favorite to cook and prove wrong! Before Lola's soy allergy, I would use soy sour cream but I made a version of this soup today that tastes pretty good despite no sour cream. 

If you do not need to avoid dairy you will want to put in twice the cheese. This dairy free cheese is pretty strong so you don't need as much. Not all bacon is free of allergens. I used Farmland's Hickory Smoked Lower Sodium bacon today because it is labeled gluten free and MSG free.

Baked Potato Soup
Yield 4 Servings

1/2 pound bacon
1/3 cup + 1 tablespoon Soy Free Earth Balance Butter Spread, divided
1/3 cup brown rice flour
4 cups almond milk
2 large baking potatoes
1 teaspoon salt
1/4 teaspoon ground black pepper
1 medium onion, diced
1/2 teaspoon garlic powder
1/4 cup Daiya cheddar cheese wedge
4 green onions, chopped

Directions: Chop bacon into bits. Bacon that is almost completely frozen will be easiest to chop. Cook bacon in a skillet over medium heat until brown and completely cooked. Place bacon bits on a paper towel covered plate to catch the grease and set aside. Dice onion and place onion and one tablespoon of butter in a soup pot. Cook onions until soft and caramelized. Remove onions and place in a separate bowl to set aside. Chop green onions and set aside. Wash, peel and dice the baking potatoes. Now put brown rice flour and 1/3 cup of butter in the soup pot and cook over medium heat until butter is melted and the mixture creates a paste. This only takes about a minute. Then slowly whisk in the almond milk and mix until the flour and butter paste is completely blended. Next add the potatoes, salt, pepper, cooked onions, and garlic powder. Cook over medium to high heat, bringing the mixture to a light boil, until potatoes become soft and a fork easily passes through the potato. How long to cook will depend on how big the potatoes are cut. Reduce heat to low and add in the chopped green onions, cheddar cheese and bacon bits. Cook for an additional 5 minutes or until cheddar cheese is completely melted. Remove from heat and serve immediately. Top soup with additional shredded Daiya cheese if desired.

Disclaimer: It is always important to read labels because brands frequently change their ingredients. These ingredients and brands work for my family but some may be processed in the same facility as wheat, soy, dairy and/or eggs and therefore depending on your severity may or may not work for your family.

Wednesday, March 4, 2015

Easy Turkey Dinner


This is an easy meal idea. We were busy seeing friends last night and I was busy during the day so I needed something that would be super easy to cook. Did you know that Jennie-O makes an oven ready boneless skinless turkey breast? It is labeled gluten free and the label doesn't show any of my other allergens. If you use the gravy packet it is gluten free but does contain dairy. I'm not sure if it's soy free since I threw it in the garbage when I saw dairy on the label. While this is fairly expensive to buy at the store at about $4.50 per pound regular price, I have frequently seen coupons for this product between $1 and $3 off. When I see a good coupon for it, I go to Walmart, find the smallest one and use my coupon. In fact, I bought one for $1 around Thanksgiving because the Ibotta app had a $5 money back rebate on it and so did the Checkout 51 app, on top of my $1 coupon!!! Most of the time it's not the cheapest meal but it's so easy that it is worth it sometimes. These turkey breasts go straight from the freezer to the oven. It cooks for 2.5 to 3 hours and all you have to do is turn the oven on, put the turkey in a baking dish and cut some slits in the plastic bag! I keep telling my sister, Melody, that she could even make this meal and she can't really cook.

Tonight our turkey was ready as soon as we returned home from visiting friends. It was still nice and juicy and we ate ours with a spinach salad and some raspberries!

Disclaimer: It is always important to read labels because brands frequently change their ingredients. These ingredients and brands work for my family but some may be processed in the same facility as wheat, soy, dairy and/or eggs and therefore depending on your severity may or may not work for your family.

Monday, March 2, 2015

Beef and Mushroom "Ramen" Noodles


I like stroganoff but right now I need to be soy free for Lola so no soy sour cream for me. I don't know of any other dairy free sour creams on the market so this dish was an attempt to capture some of those same flavors but with more of a "Ramen" noodle type flair to it versus the creamy milk and sour cream flavors in stroganoff. This dish doesn't taste like stroganoff but is still a tasty beef dish. A few ingredients in this dish to be careful about...Lea & Perrins Worcestershire sauce previously was manufactured with soy in it but more recent bottles are soy free so make sure you check your label. Beef bullion has been difficult to find but I just hate buying beef broth (or chicken broth) because I just end up paying for mostly water so I like to use bullion. It also takes up a lot less space in the pantry. Beef bullion was hard to find when it was only my allergies because so many of them contained gluten. I finally found a brand that is labeled gluten free, Orrington Farms. Their regular beef base and seasoning is gluten free but contains soy oil but the low sodium version does not for some reason. I was able to buy this at my local Cub Foods.

Beef and Mushroom Noodles
Serves 8

-1 box (12 oz) Barilla spaghetti noodles
-1 lb. stew meat, diced into bite sized pieces
-2 packages (8 oz each) sliced and washed fresh baby bella mushrooms
-1 medium to large onion, diced
-2 tablespoons fresh minced garlic
-1/4 teaspoon ground black pepper
-1/2 teaspoon sea salt
-1/4 cup sherry cooking wine
-1/8 cup olive oil
-1/2 tablespoon Lea & Perrins Worcestershire sauce
-1 tablespoon ketchup
-1/2 teaspoon Orrington Farms Low Sodium Broth Base & Seasoning

Directions: In a large pot, cook noodles per package directions or until just barely done. Because they have rice flour in them, they can easily absorb the liquid in the dish and become mushy. Therefore be careful not to overcook the noodles. Rinse noodles very well and place in a large serving bowl a few minutes before serving. In a skillet, cook mushrooms and onions on medium heat until fully cooked and soft. Add garlic to the mushroom and onion mixture. Cook for 2 minutes. Place vegetable mixture in a separate bowl and set aside. Place diced stir fry meat in a skillet. Sprinkle sea salt and pepper over stir fry pieces and cook over medium heat, After the meat is fully cooked and no longer is pink inside, add the sherry cooking wine, olive oil, Worcestershire sauce, ketchup and beef seasoning, mix well. Place vegetable mixture and meat and sauce mixture into the large bowl with the gluten free noodles. Mix together well and serve immediately.

Disclaimer: It is always important to read labels because brands frequently change their ingredients. These ingredients and brands work for my family but some may be processed in the same facility as wheat, soy, dairy and/or eggs and therefore depending on your severity may or may not work for your family.

Sunday, March 1, 2015

Chipotle Burrito Bowl

There aren't many restaurants I trust to eat at let alone fast food ones. Although with Lola's current sensitivities I can't take the chance on any restaurant. All the more reason for this recipe. One of our favorite places to eat is Chipotle. In fact, I requested and received Chipotle's chicken burrito bowl after each of my kids were born. My dad gave my mom flowers for each baby she had and I got a Chipotle burrito bowl....to each her own I guess. We ate our "Chipotle" with some grapes and chips and salsa.


Chipotle Chicken Burrito Bowl
Serves 6

-1 batch of cilantro lime rice
-1 can black beans
-1.25 lbs chicken breast
-1 package McCormick's Grill Mates Chipotle Pepper marinade
-2 tomatoes, diced
-1 bunch of Romaine lettuce
-1 (8 oz) package Daiya shredded pepper jack style shreds or mozzarella if you do not want the extra spicy flavor
-guacamole and allergy friendly sour cream optional (I haven't been able to fins sour cream that meets all of my allergy needs.)

Directions: The night before cooking and serving this meal, trim chicken breasts and place in a Ziploc bag. Mix marinade in a separate bowl according to the package directions making sure to use canola oil. Pour marinade mixture into bag of chicken, place in a container in case it leaks, and place in the fridge over night. The next day, prepare a batch of cilantro lime rice. While the rice is cooking, heat the grill and cook the marinaded chicken. While the chicken is cooking prepare the other ingredients or toppings. Dice two medium sized tomatoes and place in a bowl ready to serve. Wash and chop one bunch of Romaine lettuce. Place in a separate bowl and serve. Place Daiya cheese in a bowl to serve. Rinse the canned black beans and place in a separate bowl. Finishing grilling chicken by flipping over for equal grill marks. Cook chicken until done and juices run clear. Remove chicken from the grill and place on a plate. Dice each chicken breast and place chicken pieces in a bowl. Once pieces are all in the bowl, drizzle juices that collected on the plate over the diced chicken and serve immediately. Heat black beans and serve immediately. Place a serving of cilantro lime rice on the plate followed by black beans, chicken, cheese, lettuce and tomatoes. Top with guacamole or sour cream if desired and able to. Enjoy!

Disclaimer: It is always important to read labels because brands frequently change their ingredients. These ingredients and brands work for my family but some may be processed in the same facility as wheat, soy, dairy and/or eggs and therefore depending on your severity may or may not work for your family.

Thursday, February 26, 2015

Chicken Cordon Bleu Kiev's


Here is another meal idea for you that is a tasty meal whether you have allergies or not! Growing up we went to my grandma's house every Sunday for a noon meal. She is the best cook I know and we were always stuffed leaving her house. My mom didn't really enjoy cooking, although this seems to have changed since our allergy diagnoses. If we weren't going to grandma's on Sunday for some reason, mom usually made a special meal that we didn't have often. The one I remember most was chicken Kiev's. This meal was a treat at our house. The chicken Kiev's were the ones from the freezer section but I remember them tasting sooo good! With all of my allergies I had to say goodbye to them. To be honest it was probably a blessing in disguise given how overly processed they are. Of course if you know me, I couldn't let this be the end of chicken Kiev's and I got to work on how to create them at home. Last night we had our chicken with sweet black Thai rice. For those of you who don't have allergies you can easily use regular bread crumbs and cows milk cheese with the ingredients listed below. My favorite flavor was the chicken cordon bleu but my mom often bought the butter ones too. What is your favorite flavor or flavor idea?

Chicken Cordon Bleu Kiev's
Makes 4

-4 chicken breasts about 1/2 inch thick
-8 slices of allergy free deli ham (Land O Frost Black Forrest Ham)
-2-4 slices of Daiya Swiss cheese slices (depending on how cheesy you want it)
-1/4 cup canola oil
-1/2 cup Hodgson Mill Gluten Free Seasoned Coating Mix or make your own bread crumbs
-about 20 toothpicks

Directions: Take each chicken breast and pound out very thin with a meat hammer. With the raw chicken breast laid out, place 2 slices of deli ham over chicken breast followed by one half to one whole slice of Daiya Swiss cheese. Remember with the cheese that a little goes a long way. Starting at the shortest end of the chicken breast, roll the chicken until the ham and cheese mixture is completely rolled up and secure with 4-5 toothpicks or as many as needed. Preheat the oven to 350 degrees. Using a basting brush, lightly coat each rolled chicken breast with canola oil. The oil is only used to allow the breading to stick so use a very small amount on each chicken roll. Once oiled, roll the chicken in the seasoned coating mix or sprinkle over top until chicken is evenly coated. Bake at 350 degrees for 30 minutes or until the chicken is fully cooked and juices run clear.

Disclaimer: It is always important to read labels because brands frequently change their ingredients. These ingredients and brands work for my family but some may be processed in the same facility as wheat, soy, dairy and/or eggs and therefore depending on your severity may or may not work for your family.

Wednesday, February 25, 2015

Allergy Friendly Meat Lover's Pizza


Pizza is a favorite for our family like it is for most families. One thing that makes pizza difficult in our family though, besides allergy people versus not, is our topping preference. I'm sure this happens in a lot of families but ours is pretty opposite so we usually end up making two pizzas: an allergy free pizza and a wheat/dairy pizza. You see, David's brother is a vegetarian and so David grew up with some of your traditional meat pizzas but also a lot of cheese pizza or veggie pizza. In my family, my dad was a pork producer so it was all about the meat. We always ordered the meat lovers pizza from Pizza Hut when we went out for pizza and had tons of meat on our home made pizzas too. David thinks all of my meat is disgusting and I think his veggies are gross. So he had his wheat pizza tonight and I will give you the recipe for my meat one!!

Pizza
Serves about 8

-1 package Bob's Red Mill Gluten Free Pizza Mix (need ground flax seed, water, canola oil) or use this pizza crust recipe
-1 package (7 oz) Hormel pepperoni
-1/4 lb deli ham (We like Land O Frost Black Forrest because it's labeled gluten free.)
-1 can (4 oz) mushrooms or use fresh and precook
-1/2 lb. bacon, cut into bits (Make sure it is gluten free and has no MSG.)
-1/2 lb. ground sausage, cooked (Make sure it is gluten free and has no MSG.)
-1/2 jar (1 jar is 24 oz) soy free spaghetti sauce like some Classico or Prego flavors
-1 package (8 oz) Daiya mozzarella style shreds

Directions: Cut bacon slices into cubes and place in a skillet. Bacon seems to cut easier if it is half frozen. In a skillet, fry the bacon until it is brown and crisp. Remove from the pan and place bacon bits on a paper towel to remove the grease. In a separate skillet, fry the ground sausage until the juices run clear and it is completely cooked, set aside. Prepare crust per package directions on a 9 by 13 pan or cookie sheet, using the ground flax seed and water mixture recipe on the package as your egg replacer. Preparing the crust also involves cooking it without any toppings for 8 minutes. While the crust is cooking, dice the deli ham into small cubes and cook the mushrooms if they are fresh. After the crust is done, remove from oven and let cool for a few minutes. Spread spaghetti sauce generously over the crust. Now add the pepperoni, sausage, ham, bacon and mushrooms. Top with cheese. Remember a little of this cheese goes a long way. Bake in the oven at 425 degrees for 40 minutes. Broil on low for about 5 minutes or until cheese is completely melted. Be careful not to burn the cheese or make it too brown. While that sometimes tastes good with cow's milk cheese, it can totally ruin Daiya, in my opinion. Cut into squares and serve immediately.

Disclaimer: It is always important to read labels because brands frequently change their ingredients. These ingredients and brands work for my family but some may be processed in the same facility as wheat, soy, dairy and/or eggs and therefore depending on your severity may or may not work for your family.

Monday, February 23, 2015

Beef Roast Simmer Sauce

Beef Roast
Whether you have allergies or not you are going to want to check this out!! My house smelled AMAZING today. This simmer sauce tastes awesome and cooks my beef roast perfect every single time! I've always enjoyed a good beef roast but I made them wrong for the first 5 years of our marriage. Don't ask me how because I really don't know how. It has only been in the last 6 months or so that I have really figured out how to make the perfect roast. Before, our roasts were dry and never pulled easy or right. Now they fall apart so easy and are super juicy! After some experimenting and putting David through a couple nasty roasts, I finally have a recipe that works great. So great that we are usually fighting over the leftovers! This recipe calls for beef broth which you will want to make sure is gluten and other allergen friendly. I always look for one that carries a gluten free label. Pacific Foods carries one I can have but they are expensive. Aldi has a beef broth carton made by their Chef's Cupboard brand that is also labeled gluten free but you do have to be careful. It seems like whenever I've been there, Aldi has had a couple off brand beef broths, one is clearly labeled and the other is not. There's no reason to keep recipe a secret which is why I'm going to share with you what was for dinner at our house tonight! We served ours with some leftover rice and green beans that we had in the fridge as well as a fruit salad.

Beef Roast Simmer Sauce
Serves about 5-6 if you eat as much of it in one sitting as we do!

-One 3-4 pound beef chuck roast
-1/4 cup red cooking wine
-1/4 cup vinegar
-2 cups beef broth (ensure allergen friendly, see above)
-1 medium to large onion
-1.5 cups baby carrots
-1/4 cup minced fresh garlic
-1/2 teaspoon black pepper
-1 teaspoon salt
-1 teaspoon basil
-1 teaspoon marjoram
-1 teaspoon thyme

Directions: Place raw beef chuck roast in the crock pot. Finely chop baby carrots and onion in a food chopper or processor. Place chopped carrots, chopped onions and all ingredients listed, except for the roast, in a medium size bowl and mix well. Pour mixture over the roast in the crock pot. Make sure the mixture almost completely covers the roast. Our roasts are from the butcher so they are long and skinny. If you have a thicker roast you may need more beef broth. Cover and cook on HIGH for 6-8 hours. Remove from crock pot, scrape carrots, onions and fat off (discard) and pull apart with two forks. Serve immediately. If you want to keep the final product in the crock pot, remove roast from crock pot, scrape carrots, onions and fat off (discard) and pull beef apart with two forks. Take the crock pot full of remaining juice and vegetables and use a mesh strainer to reserve juices and strain off fat chunks, onions and carrots, discard. Place clean juices into crock pot along with pulled beef. Turn down to keep warm until ready to eat.


Disclaimer: It is always important to read labels because brands frequently change their ingredients. These ingredients and brands work for my family but some may be processed in the same facility as wheat, soy, dairy and/or eggs and therefore depending on your severity may or may not work for your family.

Home Made Ham and Cheese Hot Pockets

Ham and Cheese Hot Pocket
Do you have allergies and miss eating hot pockets? Or do you just want a healthier and tastier alternative to hot pockets from the freezer section? This is the recipe for you! As a college freshman, before my allergy diagnosis, hot pockets were just as much a staple in my diet as Ramen noodles were. Now with my allergies I miss the easiness of pulling a frozen dinner out of the freezer. Yes there are a couple I can have on the market but most of the gluten free ones that actually taste good have at least one of my other allergens in it. So I have learned to make my own hot pockets to freeze for an easy meal later. Even my husband, David, likes it when I make a wheat version of these to freeze so he has easy meals to take from the freezer to work when we don't have any good leftovers. While the ideas and opportunities are endless, tonight I made some ham and cheese hot pockets. I like to use Schar's gluten free white bread mix for these because it rolls out nicer than other mixes I've used. The kicker is that it costs $6-$7 a box! The good news is you can get quite a few pockets out of one box, especially if you choose to have your dough pretty thin. I also have been using Land O Frost for my pre-packaged deli meat since most, if not all varieties are labeled gluten free. Believe it or not, not all ham is gluten free so its just best to use one that is labeled gluten free. For these I picked out the Black Forrest Ham variety and we used green beans and banana wheels as our sides. Some other ideas though for hot pockets include; roast beef and cheddar cheese, bacon cheeseburger, Philly cheese steak, pizza pockets, chicken and broccoli, etc. What are some pocket flavor ideas you have?

Hot Pockets
Yield 12-14 depending on crust thickness preference

-1 box Schar gluten free white bread mix (You will need water, a soy free oil, and salt.)
-2 lbs Land O Frost Black Forrest Ham, diced
-1 package (7 oz) Daiya cheddar cheese wedge
-white rice flour for dusting and rolling
-Soy Free Earth Balance butter spread
-garlic salt

Directions: Mix Schar bread mix according to package directions. Dice all of the deli sliced ham. Shred the Daiya cheddar cheese wedge or buy shreds. Personally I like the taste of the wedge. Lightly dust a surface with white rice flour. The Schar dough is sticky so you will need to put some flour on your hands and even sprinkle some on top of the dough before you grab it out. Grab a small to medium sized ball of dough and roll and stretch it in your hands, adding flour as you go until it just barely doesn't stick to your hands. Take a rolling pin and roll it out. It is important to roll it half out, then pick it up, dust with more flour, flip it over and repeat a few times or you will never get it off the surface once it is completely rolled out. You will eventually do this with all of the dough. I make rectangles about 5 by 8 inches. Make about 12-14 rectangles. Preheat the oven to 350 degrees. Get out a couple of non-stick cookie sheets. You can either assemble the pockets on the surface or move the rectangle to the cookie sheet before filling. Distribute shredded cheese and chopped ham evenly to each rectangle. Fold rectangle in half. Seal the edges of the dough together by pinching it and rolling it in towards the center (see finished picture). Place each finished rectangle on a non stick cookie sheet if you haven't done so already. You may need a large turner to assist you. Melt some butter in a bowl. Using a basting brush, lightly brush each completed pocket with butter. Sprinkle garlic salt over each one. Bake at 350 degrees for 18 minutes or until dough is done. Broil for 3 minutes to brown the top. Remove and serve immediately. These also work great as a freezer meal. Once they have been cooked, let them cool completely. Wrap each pocket separately in freezer paper once cooled. Place each freezer wrapped pocket into a Ziploc bag and place in the freezer. Next time you want one, pull one out of the freezer and remove wrapping. Place the pocket on a plate. Microwave each side for 60-90 seconds and it's ready to eat again!

Disclaimer: It is always important to read labels because brands frequently change their ingredients. These ingredients and brands work for my family but some may be processed in the same facility as wheat, soy, dairy and/or eggs and therefore depending on your severity may or may not work for your family.